|
|
||||||||||||||||||
|
Christchurch and District Model Flying Club |
|
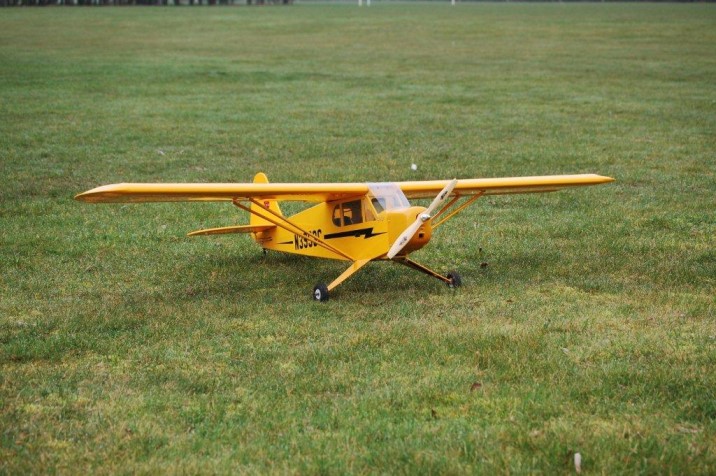
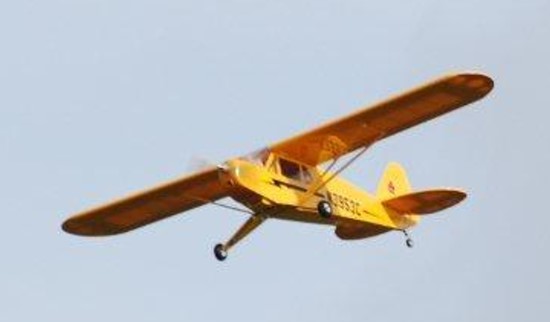
My Chinese Buddha By john stafford More excellent pictures at the foot of the page - Ed
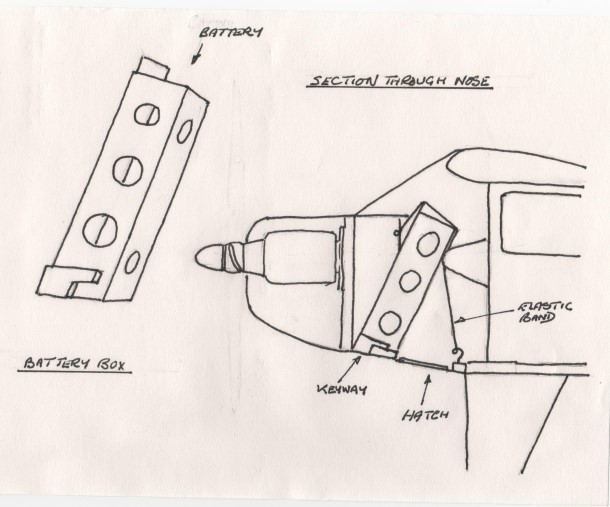
The events leading up to this story reminded me of an old Hollywood black and white mystery movie where the hero, Ray Milland maybe, wanders into an antique shop in Chinatown, probably in San Francisco, rain pouring down the windows, all dark and dingy when his eyes fall on a very old effigy of Buddha. He buys the artefact, leaves the shop and henceforth his life, for the length of the movie that is, is turned upside down. In my case the shop was The Model Workshop, which Im sure everybody will remember and the Buddha was a big box sitting on the counter screaming at me that I just had to have it. Perhaps It was something to do with the words, Special Offer £50.00, [That was the actual cost but its also an in joke that will amuse the group that fly down at Fawcetts field]. It turned out to be an ARTF Piper Cub J3 of very dubious origin but one look in the box convinced me that I was taking it home. Neil, the proprietor; remember him, of the sad eyes and beautiful German Shepherd Dog; even now probably walking with him on some Scottish Moor instead of Hengisbury Head. Anyway, Neil wrapped it up and off I went home. It was the last item I bought from him but It has certainly given me lots of interesting moments and its just so pretty to look at. I knew that the model was good but was pleasantly surprised on further inspection. The wing in particular is beautifully made, and the only fault was that it didnt line up with the fuselage but a little bit of adjustment and that was soon fixed. I still dont know who it was manufactured by as I cant remember the name on the box, which is long gone and the instruction booklet is brief to put it mildly. Suffice to say it was probably made by some Chinese lad, or lady in that enormous factory next to the Great Wall where most of our kit comes from. It was made for a 40 size glow engine, which suited my plans at that time; so as I had plenty of other things going on I put it to one side until I was ready to get it ready for flying. But some 12 months later I was beginning to have other plans for my Piper Cub. Up until that point, I had had a couple of IC models and the future seemed to lie solely with them. I had bought a small electric model some years earlier with a geared motor and nic-cad battery but it was underpowered. [I put a brushless motor in it later which transformed it but the airframe couldnt take it. Unfortunately the wings folded up one day when trying to pull out of an inside loop]. By then I was a fully paid up member of the CDMFC and the attractions of electric flying were taking over. A Seagull Extra with a Li-Po battery finally convinced me but even that aircraft proved to be a bit flimsy when part of the tailplane fell off in the air. [I was lucky to get it down but after strengthening the tailplane it flies well and I still have it]. So I looked at my IC models and their strength and durability and asked myself the question, could I replace a glow engine with a brushless motor and get the same performance. Of course the answer is yes, its going on all the time now. We have the technology. And then I remembered the Piper Cub. Yes, the Cub would be the ideal test bed for this experiment but replacing the tank with a battery, now that would prove to be tricky. At that time I didnt have the benefit of the drivecalc.de technical data and from what I had read the correlation between IC engine size seem to be that a 30 size engine requires a 3 cell Li-Po equivalent, a 40 size a 4 cell, a 50 size a 5 cell and so on. So therefore I decided to use a 4 cell 2200mah. Obviously the requirements of a fuel tank and battery are completely different. The room for the battery was there but the problem was how to get it in and out of the body easily and conveniently. I didnt want the hassle of taking the wings off at every battery change so the access point had to be from underneath. It was essential to have the battery position as far forward as possible for the C of G so it had to go in somewhere between the edge of the firewall and the main wing support former. Having had to do this on a subsequent model I may have chosen to cut a hatch in the plastic nose moulding and an aperture through the firewall but at the time I didnt want to risk weakening either in the process. I therefore chose to mount the battery in an upright position as shown in the diagram which didnt involve too much disruption of the internal supports.
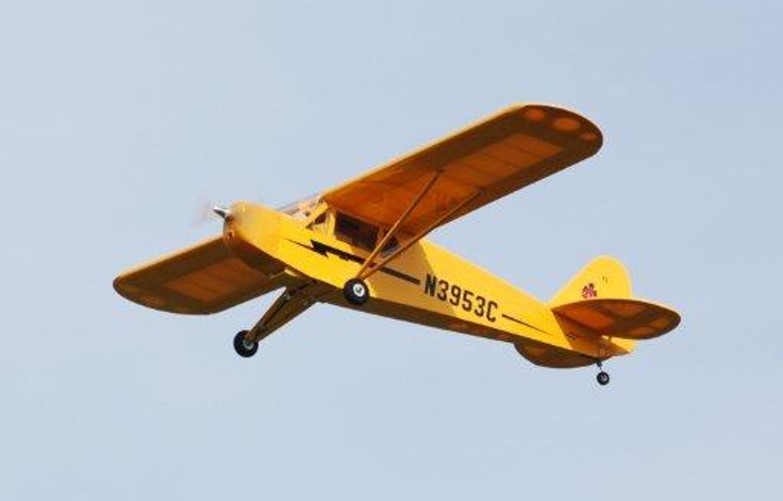
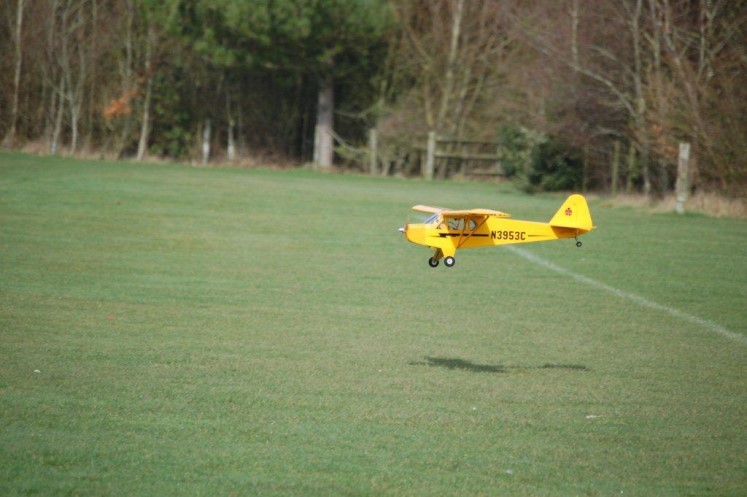
Its normal to install an appropriate box in the fuselage to house the battery but in this case I chose to have it separate and available to load the battery outside the model; sliding the whole assembly into place. It became clear that if I wanted a good solid support for the battery box right up against the firewall, I wasnt going to have much room between the firewall and the undercarriage support for the hatch. As it turned out the whole assembly just fits in nicely as shown in the diagram. I then had to devise something to hold the assembly firmly in place. I solved this by fixing an elastic band at the two points shown. The box slides in and is restrained by the band; it can then be pushed into the keyway so that it cant move forward. A small band over the top of the battery holds it in place until the main restraining band takes over. I chose a motor and escape from the Hobbyking range which looked about right. The motor, a Turnigy 3648, rated at 1450 KV and designed for aircraft of approx. 5.5 lbs, [2 to 2.5 Kilos], with a maximum current of 45 to 50 amps and power of 700watts.The propeller was a plastic 11x10 electric. The escape was a 60 amp Turnigy Plush, with BEC. As this was a big model with standard servos and something of a test bed I cautiously opted for a separate flight battery and disconnected the BEC. The installation of the motor presented no problems after removal of the engine mount as the side and down thrust is all built into the firewall. The rest of the model was assembled as normal with standard servos and hefty great pushrods although I left the wing supports and undercarriage fairings aside deciding to fit them later. The wing span of the model is 68 and the flying weight came out at 5lbs 5ozs. Came the day of the first flight which is always a bit tense, I took the Cub down to Fawcetts field. The conditions were ideal, sunny with a slight breeze and after doing the usual range check I pointed her into the wind, opened the throttle and away she rolled. A little up elevator initially, to keep the tail down and prop clear of the grass, then eased off as she picked up speed; a little rudder trim to keep her straight, a little up elevator and she lifted off smoothly and climbed away much to my delight.
I had three flights with her that morning, [I had three charged batteries], and after a small amount of trim she was very well behaved, with plenty of power to loop and roll. Each flight was of five minutes duration with plenty left in the battery, needless to say I was very happy, there was only one worry, it was a bit noisy; an increase in revs was accompanied by a corresponding increase in this high pitched whine; obviously something was not quite right. Later at home I checked the motor and prop mountings, all OK. I then looked at the manufacturers literature and found the cause.... .... To be continued. |
 |
|
Keith Young, John Stafford and Terry Butterfield at Fawcetts 24 Feb 2011 |
 |
|||
 |
|||
 |
|||||||
|
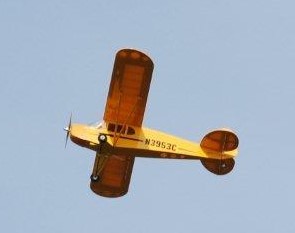
Lovely pictures John, and a very good flier, obviously! |
|||||||
 |
|||||||
|
back to Contents |
|||||||
|
[Home] [Chairman's Chatter] [Editorial] [Mustang] [Club Meetings] [Quiz Night] [Chinese Buddha] [Fournier] [Helix] [Cheaper 2.4gig] [Tiger Moth] [Diary of a Flier] [RC sailing] [Railways] [Ron Moulton] |