SLOPING OFF...
...the Newsletter of Christchurch and District Model Flying Club for March 2021
GETTING READY TO PAINT
by cornj (Tony on RCG)
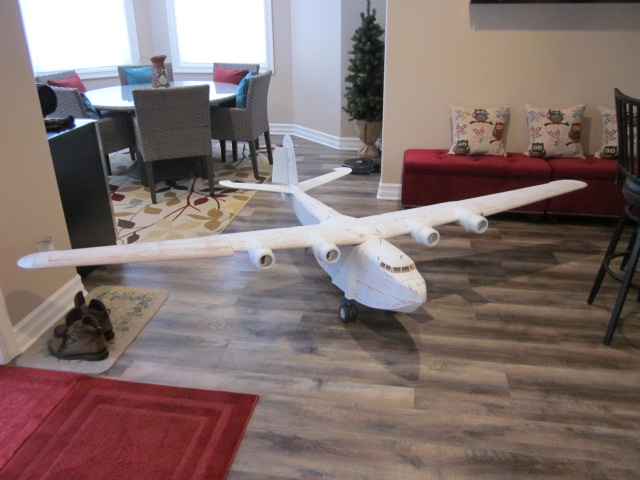
Before - 12 ft of foam, balsa, veneer and ply
Tony is making a Martin Mars from Ivan Pettigrew’s plan, but in foam not balsa. It will set the purists’ hair alight, but it has been a very interesting build and well worth following. In particular, he has some good things to say about household latex (emulsion in the UK) paint and how to apply it. Do you need a translation? - Ed
My paint booth in my shop.
Four 8' x 10' blue plastic tarps, these were on sale for $3 each, my guess is used outside would last a couple of hours but as walls to my paint booth works great. I have 1/2" x 10' gray PVC conduit screwed to the bottom of the tarps, gives the trap some weight at the bottom and easy roll up, Velcro straps used at the top to hold in place. The medal clamps pictured are used to seal the corners, use about 6 on each corner.
Two 20" Walmart box fans with cheap 20" x 20" pleated filters used to handle overspray.
Painting supplies
I use a Paasche VL airbrush with #3 tip, 25PSI
150ML syringe, I buy in packs of 5, The house paint attacks the black rubber seal and overtime becomes very hard to use, need a new one after each plane.
Standard blue windshield washer fluid (paint thinner).
Paper cups, stir sticks and paint strainer.
Monokote heat gun, for drying paint.
Green frog tape for between colors.
Masking paper from Lowes and masking tape.
Paint
I buy quarts of Valspar interior flat house paint to paint my planes (buy from Lowe's, get 10% military discount), Valspar Ultra one of their cheaper paints, I like this paint. I remove 2oz of paint and put in sealable glass jar (this is to make room for 2oz of Floetrol, I will put this back when I have room in the quart can). I add 2oz of Floetrol to slow the drying down and help the paint flow. I use interior paint because it's easy to get in Michigan in the winter and see no difference between exterior paint, I don't plan on letting my planes sit out in the rain and snow and a little fading would be welcome (would look like a real plane). Interior paint is also cheaper.
1. Mix the interior house paint, remove 2oz of paint and replace with 2oz of Floetrol, then mix again.
2. Put 100ml of paint into a paper cup and add 80ml of blue windshield washer to the cup (if using a different gun you will need to experiment with the mix). Mix well.
3. Strain the mix though the paint strainer into another paper cup. I back wash the paint strainer to use again, should last for all paint used.
4. Paint is now ready to use.
5. Spray on 3 to 4 light coats of paint. After painting on each light coat I use the Monokote heat gun to dry the paint, it will go from a wet shinny look to flat (about 10 minutes), if it’s a light coat dries fast. On this plane will get one color done per day starting with white then red and then black. I always go light to dark.
6. At this point will add decals, panel lines and exhaust residue. If wanted (I do this on war birds) I mix windshield fluid and Model Master acrylic flat black paint to make a flat black stain, I use a rag to apply and clean rag to even out. I put this on the plane to give it a dirty used look (this makes the plane look right)
7. In the spring (need to do this outside due to overspray) above 50 degrees I spray on polycrylic matt, two light coats to seal. Minwax Polycrylic Clear Matte Water-Based Polyurethane Aerosol Spray (11.5-oz) in the Sealers department at Lowes.com
Done
Tony
